If you aspire to be the next big video content creator like Bo Burnham, Zoë Tyler, or Ajey Nagar, a home studio is the logical next step. Since actually building one can feel overwhelming, we rounded up the key questions, steps, and tips for setting up a home video studio that fits the needs of your projects.
What’s your focus? First, determine what type of content you’ll be creating; this decision will inform every other choice in setting up your home studio. Different content requires different production needs. An educational history series on YouTube would benefit from a curated backdrop of books, artifacts, and historical props; a makeup tutorial on TikTok will require high-key lighting that is flattering and clear for step-by-step content. Before jumping into gear or setting up your space, start with this question.
How much space do you actually need? Mapping out your studio means negotiating how much room your content requires against how much you have to work with. Some creators have the luxury of a spare office or room they can convert into a studio with fresh paint, well-placed lighting, and some set decoration. If that’s not an option, look for areas of your home you can dedicate solely to content creation. A six-by-six-foot area with controlled light and a clean background is enough to produce a professional-looking video.
That could be the corner of a bedroom or office, an emptied walk-in closet, or a side of the garage used for storage. The only real requirement is consistency. When the setup is fixed, the variables that affect quality—lighting, background clutter, audio reverb—change less, making content easier and more consistent to produce. Moving around on every shoot, hunting for the best light, and rebuilding from scratch each time will work against you. A fixed home studio setup also makes it easier to jump on a new content idea quickly.
Gorodenkoff/Shutterstock
Camera: The question of which camera to get is one all new content creators face.
- Most cameras in recent iPhones and smartphones are more than sufficient to start creating content. Modern phone cameras often match or outperform entry-level DSLRs operated by someone who doesn’t know how to use them or light their shots properly.
- A mirrorless camera is worth considering once the creative work justifies it. Better low-light performance when shooting b-roll away from the studio, more control over depth of field, and the ability to swap lenses are meaningful upgrades for certain content types. Just make sure the upgrade follows the work, not precedes it.
Lighting: Great lighting is the most immediate way to elevate the production quality of your videos. Your home’s existing lighting is likely inadequate for video, since overhead fluorescents, an overexposed window behind the subject, or an uneven mix of lighting sources can mean poor visual quality. Instead, consider the following:
- Soft, high-key lighting can be achieved with a properly placed paper lantern lamp like this one from IKEA.
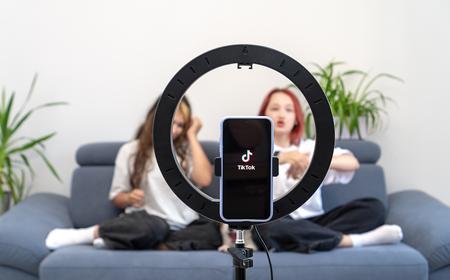
- Learning how to shoot with a ring light will take you a long way when shooting vertical social media content.
- If your budget allows, investing in quality LED lights that let you adjust intensity, color temperature, and hue will give you the most control over your lighting design. Nanlite PavoTube LED tube lights are a solid option with great control that won’t completely break the bank.
Tripod: Stability matters. Unintentional handheld footage is distracting. A tripod is a small investment and one of the highest-return purchases in a home studio, particularly for vloggers setting up and recording alone—it locks the frame you create and eliminates the risk of improper framing while recording.
Mic: If you’re shooting on an iPhone, its internal microphone won’t cut it. The key is to get the microphone as close as possible to the audio source.
- The most immediate upgrade is a lavalier mic, a wired device that clips to clothing and plugs directly into a phone or camera, runs between $20 and $80, and eliminates most of the distance and reverb problems that plague built-in mics.
- If you don’t want a lav mic visible in your shot, wireless clip-on options are a convenient alternative. PicoGear makes quality wireless lav mics comparable to wired options at around $350. The Saramonic Blink 500 B2 is a more budget-friendly wireless option.
- Another strong option is a large-diaphragm condenser mic. These can be propped up by a boom and stand or an extendable mount close to the subject in a fixed shot and are particularly well-suited for voiceover audio.
Postproduction software: When you plan to create a lot of content, editing, voiceover recording, and animation are all part of the process—and investing in a solid postproduction setup is an often-overlooked way to level up production value.
- Set yourself up with an editing tool you can start using immediately but also grow with as your skills develop. Free professional editing software is more accessible than ever. DaVinci Resolve offers a free version with robust features including cutting, sound mixing, and industry-standard color-grading tools.
- If you’re creating videos with animations or hand-drawn title cards, a drawing tablet is an incredibly useful addition. Wacom Intuos tablets are a common tool among animators and illustrators, with options for varying budgets starting at just $40. The right postproduction tools expand your creative potential and make it easier to produce engaging, high-quality content.
1. Refine your lighting.
Learn basic lighting techniques. The most foundational is three-point lighting, which involves a key light, fill light, and backlight. You don’t have to go full Roger Deakins, but developing an understanding of the differences between high-key and low-key lighting, the benefits of backlighting in separating a subject from a background, and how practicals impact a frame will go a long way in leveling up the quality of your videos.
The cheapest functional option is a window that exposes a subject from the side or at a front angle—not from behind. This produces a soft, flattering illumination that can match the quality of a $200 LED panel.
Julius Roberts’ cooking Instagram page is a perfect example of how effective natural lighting can be, particularly in his bright, verdant kitchen videos.
The problem is that natural light is inconsistent and shifts throughout the day—sometimes disappearing entirely—which is why most creators eventually invest in artificial lighting to supplement any changes. Developing your lighting skills can be an endless journey, and your equipment can scale with you, but starting with basic techniques will go a long way regardless of your gear.
2. Focus on framing and composition.
When space is limited, framing and shot composition must be precise. A few techniques can create the illusion of depth and space even in a smaller studio:
- Shoot into corners rather than flat against a wall to give your background more dimension and depth.
- Separate yourself from the background with at least four feet to create a sense of space and, with the right lens, a shallower depth of field.
- Consider camera height. A common mistake is filming with the camera too low—like a laptop on a desk—which produces an unflattering upward angle and puts the ceiling in frame instead of an intentional background. Instead, try shooting with the camera at eye level, especially when speaking directly to it.
Emmy-nominated filmmaker and YouTuber Matt D’Avella is a great example of this done well. His experience as a filmmaker is evident in his vlog-style shots, where he speaks directly to the camera at eye level.
3. Upgrade your audio.
Audio is half the experience of content. Room echo, background hum from an AC unit, and muffled dialogue can be the difference between gaining a subscriber and losing one mid-video, so listen back to your videos to ensure that your room and mic setups create clear sound.
And remember that the room itself matters as much as the mic. Hard surfaces like wooden floors and bare walls create reverb. Adding soft surfaces like rugs, curtains, or furniture will absorb that reverb and make recordings much cleaner. If you’re recording voiceover in postproduction, acoustic panels or reflection filters are worth the investment.
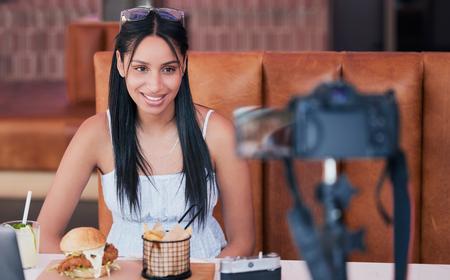
Food influencer Robert Martinez varies his shooting location depending on whatever delicacy he’s enjoying, but his stories are always expertly captured on wireless lavs.
4. Think about what’s behind you.
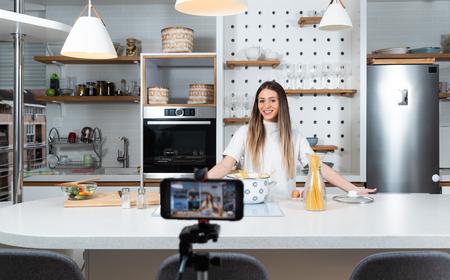
Once you have a frame, it’s time to dress the backdrop. For many creators, videos are primarily talking heads speaking to camera, edited with b-roll, and the background is where personality and story are communicated to an audience. It informs viewers about the type of content they’re watching and adds to the story you’re telling. Makeup tutorials make sense against a bedroom background; cooking tutorials work in the kitchen; and product reviews fit in an office.
The details of your backdrop should be carefully curated to your frame, as if you are dressing a set—layered, but not cluttered to the point of distraction. Every element visible behind the subject should be there on purpose. That said, there’s a place for the minimalist background, too. Many YouTubers use blank space paired with animations and infographics. It all comes down to what type of content you’re making. Just don’t overlook your backdrop.
Makeup artist Mikayla Nogueira often uses her bathroom as a backdrop for her TikTok videos to create an air of authenticity.
@mikaylanogueira THIS IS MY FAVORITE COMPLEXION LITERALLY EVER. #makeup #beauty #newmakeup ♬ original sound - Mikayla Nogueira
5. Use your phone to the best of its abilities.
Consider lens cleanliness (wipe it), mounting stability (use a tripod), and audio (almost always inadequate with the built-in mic) when using your phone to record. If the phone is clean, stable, and at eye level with external audio handling the sound, the footage it produces should be competitive with anything shot on a dedicated camera. The quality of your content will matter far more than how expensive your camera is.
YouTuber Jennelle Eliana films much of her van-life influencer content using just her phone, but in a way that feels both intimate and professional.
Ready to start using your home video studio setup to land gigs? Check out our UGC casting call database today!